Categories
WordPress Troubleshooting

Resolving the ‘Upload: Failed to Write File to Disk’ Error in WordPress

Understanding the Error

The ‘upload: failed to write file to disk’ error in WordPress is a prevalent issue that can impede the functionality of a website significantly. This error typically arises during the process of uploading media files, such as images or documents, directly into the WordPress media library. When this error occurs, it suggests that the WordPress application is unable to save the file to the designated directory on the server due to various underlying issues.

One of the common causes of this error is insufficient disk space. If the server hosting the WordPress site is running low on storage, it cannot accommodate any new files. Consequently, attempts to upload files result in failure. It is crucial for site owners to monitor their disk usage and ensure that there is adequate space available for uploads to function properly.

Incorrect file permissions can also contribute to the ‘upload: failed to write file to disk’ error. Each file and directory on a server has specific permissions that determine which users or applications can interact with them. If the permissions for the wp-content/uploads directory are not set correctly, WordPress can be restricted from writing new files. Therefore, validating and adjusting file permissions to 755 for directories and 644 for files often mitigates this problem.

Additionally, server configuration problems, such as PHP settings or limitations set by the hosting provider, can lead to this error. Certain configurations may impose restrictions on file uploads or set a maximum file size limit. Understanding these configurations is essential for troubleshooting and resolving this error effectively. Overall, by identifying the root cause of the ‘upload: failed to write file to disk’ error, WordPress users can take appropriate steps to restore the file upload functionality of their websites.

Checking Disk Space and Quota

To effectively resolve the ‘Upload: Failed to Write File to Disk’ error in WordPress, it is crucial to check your server’s disk space and confirm whether you have exceeded your storage quota. The first step is to log in to your hosting account dashboard, where you can typically find a section dedicated to the management of your account. This area often displays vital information regarding your current disk usage, including total space allocated versus space consumed.

Alternatively, if your hosting provider offers FTP access, you can check the disk space through an FTP client. After connecting to your server, look for information within the client that indicates the available disk space. Depending on the software you are using, this might be found in the status bar or through a specific command. Identifying the amount of space you have left is essential, as a full disk can cause issues during file uploads.

If your checks reveal that you are running low on disk space, it is advisable to take immediate action to alleviate the situation. Start by identifying and deleting unnecessary files from your server, such as old backups, outdated themes, or plugins that are no longer in use. Additionally, you should consider optimizing your media library by removing unused images and media files, which can occupy a significant amount of space.

For long-term solutions, think about upgrading your hosting plan to one that offers more storage, or exploring external storage solutions, like cloud services, to accommodate large files. By maintaining a healthy disk space and efficiently managing your resources, you can help prevent similar issues in the future and ensure a smoother experience when uploading files to your WordPress site.

Fixing File Permissions

File permissions play a crucial role in the functioning of a WordPress site, particularly when it comes to file uploads. The ‘Upload: Failed to write file to disk’ error often stems from incorrect file permissions, which restrict the server’s ability to write files to specific directories. Therefore, ensuring that your file permissions are set correctly is essential in resolving this issue.

In WordPress, the recommended permissions for directories are typically 755 while files should be set to 644. This configuration grants the server sufficient permissions to read and write files, thus preventing upload errors. However, permissions may vary based on server configurations, so it is important to cross-check your host’s documentation or consult with your hosting provider for their recommended permissions settings.

To check and modify file permissions, you can use either an FTP client such as FileZilla or your web hosting control panel. For FTP, connect to your site, locate the WordPress directory (often named public_html or www), and right-click on folders or files to access the permission settings. In the control panel, most platforms provide a ‘File Manager’ tool that lets you manage permissions through a user-friendly interface.

Once you have accessed the permissions settings, make sure all directories under wp-content, including uploads, are set to 755. Change any files that are incorrectly set to 640 or 600 to 644. After applying these changes, attempt the upload again.

If issues persist, you may want to consider resetting the ownership of the files to the appropriate user through the command line, if you have access. This can also resolve permissions-related problems. Overall, addressing file permissions is a fundamental step in troubleshooting the ‘Upload: Failed to write file to disk’ error and ensuring smooth operation of your WordPress site.

Server Configuration and Other Solutions

Resolving the ‘Upload: Failed to Write File to Disk’ error in WordPress can sometimes require delving into more technical aspects of server configuration. A common culprit behind this issue is the server’s PHP settings, particularly the limitations set on file uploads. To begin, you might want to check the PHP configurations related to file uploads. The directive upload_max_filesize controls the maximum file size that can be uploaded, while post_max_size should be set larger than upload_max_filesize to ensure smooth file handling. As a starting point, consider increasing these values to accommodate larger uploads than usual.

Another important setting is memory_limit, which can affect the script execution during file uploads. If the limit is too low, it may prevent large files from being uploaded. Adjusting these settings can be done through the php.ini file, .htaccess file, or even via the WordPress Dashboard if your hosting provider allows it. If you lack the necessary access, consulting your hosting provider’s support team may help clarify any restrictions on these configurations.

Additionally, the temporary directory where uploaded files are stored is critical. If the location designated for temporary uploads is not writable or does not exist, this can lead to the upload failure message. You can define the temporary upload directory in the wp-config.php file by adding define(‘WP_TEMP_DIR’, ‘/path/to/temp/’);, ensuring that the path has the correct permissions for writing files.

If you have gone through the server configuration adjustments and the problem persists, it is advisable to reach out to your hosting provider’s support team. When contacting them, be prepared to provide details regarding the error messages, any steps you have taken, and the specific PHP settings you have adjusted. This information will help expedite the troubleshooting process and get your WordPress site back on track.

Categories
WordPress Help

How to Fix the ‘Are You Sure You Want to Do This?’ Error in WordPress

Understanding the ‘Are You Sure You Want to Do This?’ Error

The ‘Are You Sure You Want to Do This?’ error is a common issue faced by WordPress users, manifesting when a user attempts to execute certain actions within the WordPress dashboard. This error typically appears during tasks such as updating plugins, configuring themes, or making administrative changes. It serves as a protective measure, designed to prevent accidental modifications that could lead to adverse effects on the website.

One of the most frequent indicators of this error relates to permission issues, which may arise when the current user lacks the appropriate capabilities to complete a specified action. This can happen if the user role is not properly configured or if there are restrictions placed on actions that users can perform. Additionally, invalid URLs can also trigger this error, leading users to be unable to access certain pages or functionalities within their WordPress site. Such issues can stem from incorrect site settings, often due to maintenance, migration, or changes in site structure.

Another source of this error can be attributed to conflicts arising from themes or plugins. Sometimes, third-party extensions may interfere with core WordPress functionalities, leading to unexpected behavior, including the appearance of the aforementioned error message. In instances where multiple plugins are used, incompatibility between them can exacerbate these types of complications. Identifying the root cause of the problem can involve disabling plugins or switching themes to assess whether the issue persists.

In many cases, this error might seem daunting; however, understanding its origins can enable users to troubleshoot effectively. By identifying whether it’s a result ofpermissions issues, invalid URLs, or conflicts with other elements within WordPress, users can take decisive steps to resolve the error and proceed with their intended actions seamlessly.

Common Causes of the Error

The ‘Are You Sure You Want to Do This?’ error in WordPress manifests for a variety of reasons, often disrupting the user experience. Identifying the root cause is essential for efficiently resolving the issue. This section will delve into several common causes related to this error, enhancing your understanding and aiding in troubleshooting.

One prevalent reason behind this error is incorrect file permissions. WordPress relies on certain directory and file permissions to function optimally. If files or folders possess overly restrictive permissions, this can hinder the system’s ability to execute necessary tasks, triggering the error message. Ensuring that file permissions are correctly set is crucial, as WordPress usually requires directories to be set to 755 and files to be set to 644.

Corrupted core files are another potential contributor to the error. A faulty WordPress installation or interrupted update processes can lead to corrupted files. When core files are compromised, WordPress may not perform as expected, resulting in the appearance of the error message. In such cases, re-uploading or updating the core files can address the problem and restore functionality.

Plugin or theme conflicts are also common culprits when dealing with the ‘Are You Sure You Want to Do This?’ error. If a newly installed or updated plugin or theme conflicts with existing ones or with WordPress core functionalities, it may lead to unexpected behaviors. To diagnose this, deactivating all plugins and then reactivating them one by one can help determine the offending component. Similarly, switching to a default WordPress theme may resolve any theme-related issues.

Lastly, issues within the .htaccess file can also provoke this error. This file governs server behavior and plays a crucial role in the functioning of various website features. If this file becomes corrupted or misconfigured, it could lead to the manifestation of unexpected error messages. Regenerating the .htaccess file through WordPress settings may help resolve related issues.

Step-by-Step Solutions to Fix the Error

The ‘Are You Sure You Want to Do This?’ error in WordPress can be frustrating, but there are several actionable solutions that can help you resolve the issue efficiently. Below are the step-by-step instructions for various methods to tackle this error.

Firstly, checking file permissions is a crucial step. Incorrect file permissions may lead to this error. Access your server via an FTP client, right-click on your WordPress installation folder, and select ‘File Permissions.’ Make sure that the permissions are set to 755 for folders and 644 for files. After adjusting the permissions, refresh your website to see if the error persists.

Another method to fix this issue involves resetting the .htaccess file. This file controls various settings for your site, and an error in its configuration can trigger the issue. To reset it, connect to your WordPress site’s files through an FTP client, locate the .htaccess file in the root directory, download a copy for backup, and then delete the file from the server. After deletion, log in to your WordPress dashboard, navigate to Settings > Permalinks, and click ‘Save Changes’ to generate a new .htaccess file automatically.

If the error remains unresolved, consider deactivating your plugins one by one. Sometimes, a faulty plugin can cause conflicts leading to the error message. In your dashboard, go to Plugins > Installed Plugins. Temporarily deactivate each plugin and check if the error disappears. If it does, reactivate each plugin one at a time to identify the culprit.

Lastly, switching to a default theme can help identify if the theme you are using is causing issues. Go to Appearance > Themes in your dashboard and activate a default WordPress theme such as Twenty Twenty-One. Observe if the error persists. If switching the theme resolves the problem, your current theme may need updates or adjustments.

By following these prescribed solutions, you should be able to address the ‘Are You Sure You Want to Do This?’ error effectively, enabling a smoother navigation experience within your WordPress site.

Preventing Future Occurrences of the Error

To ensure a smooth and error-free experience with WordPress, it is crucial to implement several preventative measures that can mitigate the chances of encountering the ‘Are You Sure You Want to Do This?’ error in the future. Regularly updating your WordPress core, themes, and plugins is one of the most vital steps in maintaining a secure and stable website. Keeping your software up to date not only introduces new features but also patches vulnerabilities that could otherwise compromise your site. Setting up automatic updates is an effective way to ensure you never miss important releases.

In addition to regular updates, maintaining proper file permissions is essential. Incorrect file permissions can lead to a range of issues, including this particular error. Make sure that your files have the correct permissions set, typically 644 for files and 755 for directories, which allows the necessary read/write access while minimizing security risks.

Adopting best practices for website maintenance further promotes a robust online environment. Regular backups of your database and files should be a non-negotiable part of your strategy, allowing for quick restorations in case of errors or data loss. Utilizing a reliable backup plugin can automate this process, giving you peace of mind.

It is also beneficial to regularly monitor your website for any performance issues or error messages. Using tools to check for broken links, missing files, or loading speed can help identify potential problems before they escalate. Additionally, establishing a staging site for testing changes before implementing them on your live site can provide an added layer of security, ensuring that updates do not introduce unexpected errors.

By proactively adopting these strategies, you can significantly reduce the likelihood of facing the ‘Are You Sure You Want to Do This?’ error, ensuring a seamless and efficient WordPress experience moving forward.

Categories
WordPress Events

WordCamp Asia 2026: A New Era in WordPress Gatherings in India

Introduction to WordCamp Asia 2026

WordCamp Asia 2026 marks a significant milestone in the evolution of WordPress gatherings, signaling a new era for the community, particularly in India. WordCamps are casual, locally organized conferences that bring together WordPress enthusiasts, developers, designers, and users from around the globe. They offer a unique platform for sharing knowledge, networking, and fostering collaboration among individuals with a shared passion for WordPress.

The announcement that India will host WordCamp Asia 2026 has generated considerable excitement within the WordPress ecosystem. As an emerging hub for technology and digital innovation, India’s selection as the host country highlights not only the growth of the WordPress community in the region but also reflects the nation’s growing influence in the global tech landscape. India’s diverse population, coupled with its extensive and rapidly expanding internet user base, positions it as an ideal location for such a gathering.

This forthcoming event is expected to attract participants from various backgrounds, including seasoned professionals as well as newcomers eager to learn more about WordPress. The significance of this gathering extends beyond local borders, as it will serve to solidify connections within the Asia-Pacific WordPress community, fostering collaboration and sharing insights that can help propel the platform’s growth further. Additionally, the diverse perspectives and expertise that will converge at WordCamp Asia 2026 will enrich discussions and enhance attendees’ overall experience.

Hosting this event in India also underlines the nation’s commitment to supporting open-source projects and communities. As WordCamp Asia 2026 approaches, anticipation continues to build, reflecting the shared enthusiasm for further advancing the interests and capabilities of the WordPress community throughout Asia.

Why India is the Perfect Host for WordCamp Asia

India has increasingly emerged as a significant player in the global WordPress community, showcasing a remarkable growth trajectory that positions it as an ideal host for WordCamp Asia 2026. With a rapidly expanding user base, WordPress has gained substantial traction among developers, designers, and content creators across the country. India’s diverse digital landscape not only fosters innovation but also nurtures a rich variety of themes and plugins that contribute to the overall ecosystem.

The country’s thriving tech ecosystem further enhances its suitability for major events such as WordCamp Asia. India is home to a multitude of tech startups and software development firms, demonstrating a robust environment for growth and collaboration. With multiple cities becoming tech hubs, the availability of talented professionals proficient in WordPress development continues to rise. This burgeoning community is driven by a desire for knowledge sharing, networking, and collaboration, embodying the very essence of what WordCamp events are designed to promote.

Additionally, India’s rich cultural diversity mirrors the inclusiveness synonymous with the WordPress ethos. Participants from various backgrounds and regions can easily engage in sharing ideas, best practices, and innovations, fostering a spirit of collaboration that is central to WordCamp gatherings. The country’s myriad languages, traditions, and practices will provide attendees with a unique cultural experience that enriches their participation in the event.

Moreover, India boasts modern infrastructure and facilities in major cities, designed to accommodate large-scale international events. Cities like Bangalore, Delhi, and Mumbai increasingly feature world-class conference venues, efficient transportation networks, and a plethora of accommodations suitable for attendees from all corners of the globe. This infrastructure will undoubtedly enhance the accessibility and overall experience for international participants at WordCamp Asia 2026.

What to Expect at WordCamp Asia 2026

WordCamp Asia 2026 is set to be a transformative event for WordPress enthusiasts, developers, and businesses alike. Attendees can expect a comprehensive lineup of events designed to cater to a diverse audience, ranging from newcomers to seasoned professionals. The core of the gathering will include insightful talks, hands-on workshops, and numerous networking opportunities aimed at fostering collaboration and knowledge exchange.

In terms of themes, the event is likely to encompass a wide range of topics relevant to the WordPress ecosystem. Potential themes may include website optimization, the evolution of eCommerce, accessibility, and the future of web development. This array of subjects will not only enhance technical skills but also broaden perspectives on how WordPress can adapt in an ever-changing digital landscape. Speakers from the global WordPress community, including notable developers, designers, and entrepreneurs, are anticipated to share their experiences and insights, providing invaluable knowledge to attendees.

Workshops at WordCamp Asia 2026 promise to offer practical, skill-building sessions that focus on emerging technologies and techniques associated with WordPress. Participants will have the opportunity to engage directly with leading experts, fostering a learning atmosphere that encourages hands-on experience and immediate feedback. Added to this will be various panel discussions where thought leaders can share their visions for the growth and direction of WordPress, stimulating discussions and inspiring new ideas.

Moreover, networking remains a vital component of WordCamp Asia 2026, with multiple social events organized throughout the schedule. These occasions will create an environment conducive to forming professional connections, sharing resources, and even collaborating on future projects. By bringing together a rich mix of individuals, WordCamp Asia 2026 will undoubtedly enrich every attendee’s knowledge, skill set, and professional network related to WordPress.

How You Can Participate and Get Involved

WordCamp Asia 2026 presents an exceptional opportunity for individuals to engage with the WordPress community in India. There are various avenues through which you can participate, whether you are a seasoned participant or a newcomer eager to learn more about WordPress.

First, volunteering is one of the most impactful ways to get involved. The success of WordCamp largely depends on the dedication and enthusiasm of volunteers. By offering your time and skills, you can help with various tasks, including event organization, attendee registration, and managing speaker sessions. Volunteers not only gain hands-on experience but also have the chance to network with industry professionals and fellow enthusiasts. You can look for volunteer application announcements on the official WordCamp website or related community channels to get started.

Sponsorship is another vital component that supports the event’s success. Organizations and businesses can make a significant impact by becoming sponsors. Sponsorship provides an excellent platform for companies to showcase their products and services while also supporting the broader WordPress ecosystem. Different sponsorship levels are typically available, and these can encompass branding opportunities, exhibitor booths, or even speaking engagements. Interested parties should consult the WordCamp Asia website for detailed sponsorship packages and benefits.

Furthermore, registration is essential for those looking to attend. Early registration can often lead to reduced ticket prices and guarantees your place at the event. Keep an eye on the official website for notifications regarding ticket sales, pricing, and any promotional opportunities that may arise.

Lastly, staying informed about WordCamp Asia 2026 is crucial. Follow the event’s official channels, including social media platforms and newsletters, to receive timely updates and news. Engaging with the community online fosters a culture of connection and collaboration, further enhancing the overall experience of this gathering.

Categories
WordPress Issues

How to Fix Common Image Issues in WordPress

Here are some possible reasons why you might be seeing it:

  • Images not uploading – Maybe your images are too large, or WordPress is blocking them.
  • Broken or missing images – This happens if the image link is incorrect or the file was deleted.
  • Blurry images – WordPress might be resizing your images poorly.
  • Slow-loading images – Large images or missing caching can slow things down.
  • Images not showing after migration – If you moved your site, the image paths might be wrong.

Here are some common image issues in WordPress and how to fix them:

1. Images Not Uploading:

  • Check the file size limit in Media Settings.
  • Increase PHP upload limits via wp-config.php or php.ini:
     
    @ini_set( ‘upload_max_size’ , ‘256M’ );
    @ini_set( ‘post_max_size’, ‘256M’);
    @ini_set( ‘max_execution_time’, ‘300’ );
  • Ensure proper folder permissions (wp-content/uploads should be 755 or 775).

2. HTTP Error When Uploading Images:

  • Refresh the page and try again.
  • Disable plugins that might conflict with the media uploader.
  • Increase memory limit in wp-config.php:
     
    define(‘WP_MEMORY_LIMIT’, ‘256M’);
  • Change the image format (e.g., try JPEG instead of PNG).

3. Broken Images or Thumbnails Not Appearing:

  • Regenerate thumbnails using the Regenerate Thumbnails plugin.
  • Check image URLs (ensure they are correct and not leading to 404 errors).
  • If using a CDN, clear the cache.

4. WordPress Images Are Blurry:

  • Use high-quality images before uploading.
  • Ensure proper thumbnail sizes in Settings > Media.
  • Add the following in functions.php to ensure correct image sizes:
     
    add_filter( ‘jpeg_quality’, function( $arg ) { return 100; } );

5. Featured Image Not Displaying:

  • Ensure the theme supports featured images:
     
    add_theme_support(‘post-thumbnails’);
  • Check if the featured image is set correctly in the post editor.

6. Images Not Loading After Migration:

  • Update image URLs using the Better Search Replace plugin.
  • Ensure the uploads folder is correctly transferred.

7. Images Load Slowly:

  • Use image optimization plugins like Smush or Imagify.
  • Enable lazy loading (built-in since WordPress 5.5).
  • Serve images via a CDN like Cloudflare or BunnyCDN.
Categories
WordPress Issues

How to Resolve the HTTP Image Upload Issue in WordPress

The HTTP Image Upload Error in WordPress usually happens when you’re attempting to upload images or other media to your site, but the process fails and an error message appears. This issue can arise due to various factors, and addressing it requires identifying the underlying cause. Below is an overview of why this error may occur and how to fix it.

Common Reasons for the HTTP Image Upload Error:

1. File Size or Format Problems:

  • WordPress imposes a default upload size limit, and if the file exceeds this limit, the upload may fail.
  • The image file type might not be supported, especially if it’s not in a standard format like JPG, PNG, or GIF.

2. File Permission Issues:

  • Incorrect file or folder permissions may block WordPress from uploading media files properly.

3. Server Settings:

  • The PHP settings on your server might restrict large file uploads.
  • Low memory or file size limits defined in the
    php.ini file could trigger this error.

4. Conflicts with Plugins or Themes:

  • A plugin or theme conflict could interfere with the upload process, causing the error to appear.

5. HTTP and Network Problems:

  • Temporary network glitches or server misconfigurations can lead to the upload error.
  • The issue might also be caused by browser-related problems or caching errors.
How to Resolve the HTTP Image Upload Issue in WordPress

How to Resolve the HTTP Image Upload Error:

1. Increase Upload Limits:

  • Modify your php.ini file to increase the values for
    upload_max_filesize and post_max_size.
  • Alternatively, add the following lines to your .htaccess file:
    php_value upload_max_filesize 64M
    php_value post_max_size 64M
    php_value memory_limit 256M
    php_value max_execution_time 300
    php_value max_input_time 300

2. Verify File Permissions:

  • Check that the wp-content/uploads folder has the correct file permissions. Set directories to 755 and files to 644.

3. Adjust the Image Format or Resize:

  • If the image format is unsupported or the file is too large, switch to a compatible format (like JPG or PNG), or resize the image before uploading.

4. Disable Plugins and Switch Themes:

  • Temporarily deactivate all plugins and switch to a default theme (e.g., Twenty Twenty-One) to identify if a plugin or theme is causing the issue. Reactivate each plugin one by one to find the conflict.

5. Regenerate Thumbnails:

  • Use the Regenerate Thumbnails plugin to fix any problems related to image resizing that might be causing the error.

6. Clear Your Browser Cache:

  • Cached data in your browser can sometimes interfere with uploads. Clear your browser’s cache or try uploading in a different browser.

7. Increase PHP Limits (via .htaccess, wp-config.php, or php.ini):

  • If you can’t access the php.ini file, add the following to your wp-config.php file:

    define(‘WP_MEMORY_LIMIT’, ‘256M’);

8. Check for HTTP Errors:

  • Examine your server’s error logs for any HTTP-related issues. If necessary, contact your hosting provider for support.
Categories
WordPress Issues

How to Fix WordPress Login Page Refreshing and Redirecting Issue

This can be caused by:

  • Incorrect Site URL Settings – Wrong values in the database can cause login redirection.
  • Corrupt .htaccess File – Misconfigured rewrite rules can prevent login.
  • Plugin Conflicts – Security or redirection plugins may block access.
  • Theme Issues – A faulty theme can interfere with the login process.
  • Browser Cache & Cookies – Outdated cache or blocked cookies can prevent login.
  • Corrupt WordPress Files – Damaged core files can break authentication.
user-login-illustration
How to Fix It:

If your WordPress login page keeps refreshing or redirecting without letting you log in, here are some ways to fix it:

1. Clear Your Browser Cache and Cookies

Sometimes, old cookies and cache can cause login issues. Try clearing them and then log in again.

2. Check Your Site URL Settings

If your website URL is incorrect, it can cause login problems.

  • Log in to your hosting control panel and open phpMyAdmin.
  • Find the wp_options table.
  • Look for siteurl and home and make sure they have the correct URL (e.g.,https://yourdomain.com.
  • If they are wrong, update them.

3. Rename or Delete the .htaccess File

  • Connect to your site using FTP or File Manager in your hosting account.
  • Find the.htaccess file in your site’s root folder.
  • Rename it to .htaccess_old and try logging in again.
  • If this fixes the issue, go to Settings > Permalinks in WordPress and click “Save Changes” to generate a new .htaccess file.
  •  

4. Disable Plugins

A faulty plugin can sometimes cause login issues.

  • Connect to your site using FTP or File Manager.
  • Go to wp-content/plugins/ and rename the plugins folder to plugins_old.
  • Try logging in again.
  • If you can log in, rename the folder back to plugins and activate your plugins one by one to find the one causing the issue.

5. Switch to a Default Theme

  • If the problem started after installing or updating a theme, try switching to a default WordPress theme like Twenty Twenty-Four.

    • Go to wp-content/themes/ using FTP or File Manager.
    • Rename your current theme folder (e.g., yourtheme_old).
    • This will force WordPress to use a default theme.

6. Check Your wp-config.phpFile

  • Open wp-config.php in your site’s root folder.
  • Look for these lines:
     
    define(‘WP_HOME’, ‘https://yourdomain.com’);
    define(‘WP_SITEURL’, ‘https://yourdomain.com’);
  • Make sure they match your website’s actual URL.

7. Reset Your Password

  • If you suspect your password is wrong:

    • Open phpMyAdmin and go to the wp_users table.
    • Find your username and update the password using this SQL query:
       
      UPDATE wp_users SET user_pass = MD5(‘yournewpassword’) WHERE user_login = ‘yourusername’;
    • Replace yournewpassword with your actual new password.

8. Increase PHP Memory Limit

If your site is running out of memory, you can increase it by adding this line to wp-config.php:

 
define(‘WP_MEMORY_LIMIT’, ‘256M’);

9. Restore a Backup

If nothing works, restoring a previous backup of your website might be the best option.

Categories
WordPress Issues

How to Fix When You Are Locked Out of WordPress Admin

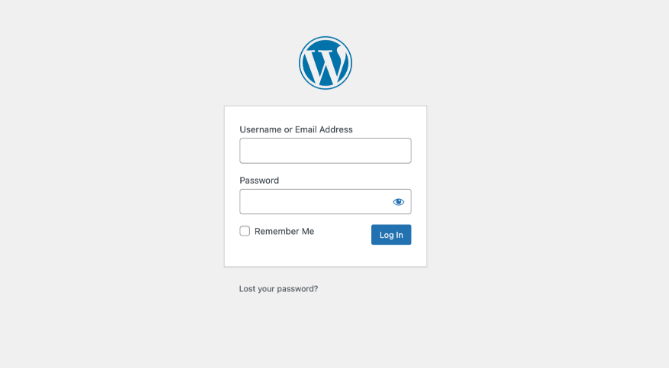
If you’re locked out of your WordPress admin, and Here are the most common reasons:

  • You forgot the password or username.
  • A security plugin (like Wordfence, iThemes Security) blocked you due to failed logins.
  • A faulty plugin/theme is causing a crash.
  • A misconfigured .htaccess file may block admin access.
  • Server-side issues, like database corruption or memory limits.
  • Your admin user role was changed or deleted.
open-laptop-with-log
How to Fix It:

Here are some easy ways to fix sidebar below content error :

1. Forgot Password?

If the password reset email doesn’t arrive, reset it manually:

  1. Log in to your hosting cPanel and open phpMyAdmin.
  2. Find the wp_users table.
  3. Locate your username, click Edit, and update the user_pass field.
  4. Set the function to MD5, enter a new password, and save.

2. Locked Out by a Security Plugin?

If too many failed logins triggered a lockout:

  • Access your website files via FTP or cPanel File Manager.
  • Go to wp-content/plugins.
  • Find your security plugin folder (like Wordfence or iThemes Security) and rename it (e.g., wordfence_disabled).
  • Try logging in again.

3. A Plugin or Theme is Causing Problems

  • Use FTP or File Manager to access wp-content/plugins.
  • Rename the plugins folder to plugins_old (this disables all plugins).
  • If you can log in now, rename it back and disable plugins one by one to find the faulty one.
  • If it’s a theme issue, rename the wp-content/themes/your-theme-folder to something like theme_old.
4. .htaccess File Issue

If your site is giving you a blank page or login redirects:

  • Go to cPanel > File Manager > public_html.
  • Find the .htaccess file and rename it to .htaccess_backup.
  • Try logging in. If it works, go to Settings > Permalinks in WordPress and click Save Changes to create a new .htaccess file.

5. Your Admin Account is Deleted or Changed

If someone removed or downgraded your admin role:

  • Open phpMyAdmin and go to wp_users.
  • Click Insert to add a new admin user manually.
    • Username: newadmin
    • Password: yourpassword (Set function to MD5)
    • Email: your@email.com
  • Assign admin rights in the wp_usermeta table:
    • Insert a new row with meta_key: wp_capabilities and meta_value: a:1:{s:13:”administrator”;b:1;}
6. Server or Memory Issues

If your site keeps crashing:

  • Increase PHP memory limit by editing wp-config.php and adding:
    define(‘WP_MEMORY_LIMIT’, ‘256M’);
  • If the database is corrupted, add this to wp-config.php:
    define(‘WP_ALLOW_REPAIR’, true);
    Then go to: yourwebsite.com/wp-admin/maint/repair.php and follow the steps.
Categories
WordPress Issues

How to fix the “Connection timed out” error in WordPress

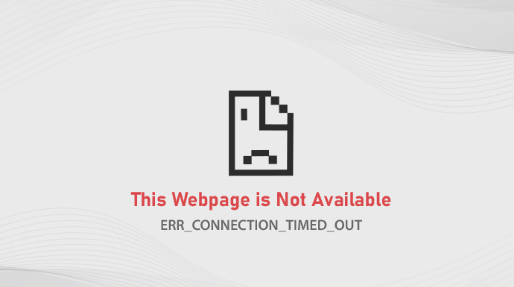
The “Connection Timed Out” error in WordPress usually means the server is taking too long to respond to a request, causing it to time out. Here are some simple reasons why this happens:

  • Server may be too busy or lacking the resources (like memory or CPU) to handle all the tasks.
  • Sometimes a plugin or theme can cause WordPress to slow down or even crash.
  • website may be hitting a limit on how much memory or time it can use, which causes it to stop working.
  • A messed-up file can prevent your site from loading
  • WordPress might be asking the server to do too much at once, especially if there’s no cache.
  • Sometimes, the server settings might be too strict, leading to timeouts.
  • The issue is with the network connection or the DNS (address) lookup.
ERR_CONNECTION_TIMED_OUT
How to Fix It:

Here are some easy ways to fix connection timed out error:

1. Server Overload

Reach out to your hosting provider to check for server issues. If you have a lot of visitors, you may need a better hosting plan.

2. Plugin or Theme Issues

Disable all plugins and see if that fixes the issue. If it does, turn them on one by one to find the problem plugin.

3. Low PHP Limits

Increase the memory limit by adding a small line of code in your wp-config.php file : 

define(‘WP_MEMORY_LIMIT’, ‘256M’);

4. Broken .htaccess File

Rename the .htaccess file to something else (e.g., .htaccess_old) and reload the site. Then, go to Settings > Permalinks in WordPress and save changes to create a new .htaccess file.

5. Too Many Database Requests

Use a caching plugin like W3 Total Cache to reduce the load on the server.

6. Server Configuration Issues

Ask your hosting provider to make sure the server is set up properly for WordPress.

7. Network or DNS Issues

You can flush your DNS cache or try accessing the site from a different device or network.

8. High Traffic or Attacks

Consider using a service like Cloudflare to protect your site from these issues.

9. Corrupted WordPress Files

Go to your WordPress dashboard and reinstall WordPress from the Updates section.

Categories
WordPress Issues

How to Fix the Sidebar Below Content Error in WordPress

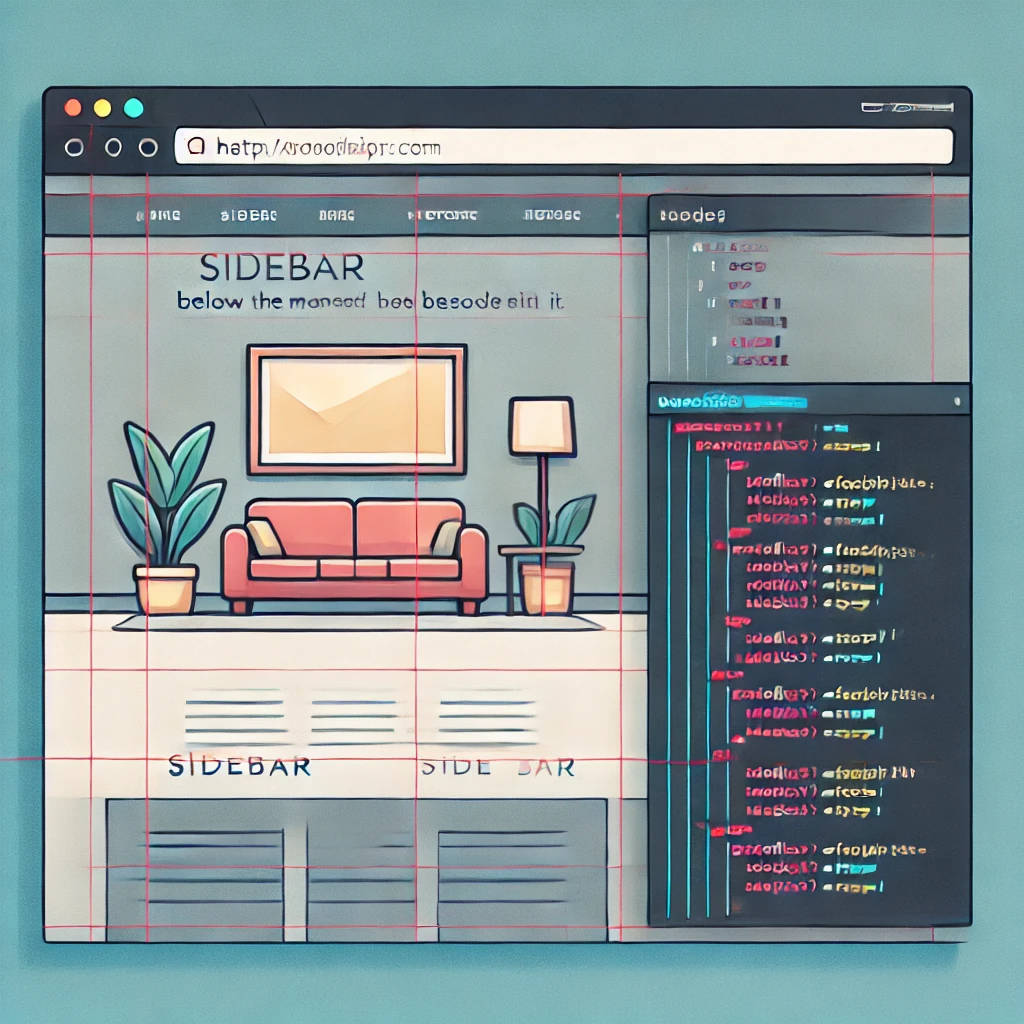
The “Sidebar Below Content” error in WordPress occurs due to layout issues caused by incorrect HTML structure, CSS misconfigurations, or conflicts with themes and plugins.

Screenshot_31
How to Fix It:

Here are some easy ways to fix sidebar below content error :

1. Undo Recent Changes to Your Theme

If your sidebar was working fine before and suddenly moved, think about any recent changes you made to your theme files or settings. Did you edit your theme’s CSS or PHP files? Install a new plugin?

Try rolling back those changes one by one to see if that fixes the problem. If you’re using a child theme, check there too. And if you’re not sure what changed, don’t worry—we have more troubleshooting steps below!

2. Clear Your Cache

Sometimes, the issue isn’t actually with your site—it’s just that you’re seeing an older version due to caching.

  • If you’re using a caching plugin like WP Rocket or W3 Total Cache, clear your site cache.
  • Also, clear your browser cache and refresh your page (CTRL + F5 or CMD + Shift + R).

If the sidebar appears correctly after this, then it was just a cache issue!

3. Check Your Plugins

Plugins can sometimes add extra CSS or HTML that messes up your layout. To check if a plugin is the problem:

  1. Go to Plugins » Installed Plugins in your WordPress dashboard.
  2. Deactivate all plugins at once.
  3. Check your site—if the sidebar goes back to normal, then a plugin was the issue.
  4. Reactivate plugins one by one and check after each one to see which one breaks the layout.

Once you find the problematic plugin, you can either look for an update, adjust its settings, or contact the plugin developer for support.

4. Fix Broken <div>Tags

A very common cause of this issue is broken HTML structure—meaning an extra or missing <div> tag.

If the issue only happens on certain pages, check the specific template file that controls those pages. For example:

  • If the problem is on blog posts, check single.php.
  • If it’s on pages, check page.php.

To find and fix the issue, you can:
i. Use the W3C Validator to check for unclosed <div>tags.
ii. Open your theme files in a code editor (like VS Code) and look for any missing or extra </div>.
iii. Use your browser’s Inspect Tool (right-click > Inspect) to see the HTML structure.

Once you fix any broken <div> tags, your sidebar should go back to normal.

5. Fix CSS That’s Pushing the Sidebar Down

Your theme uses CSS to define the width of the content and sidebar. If the widths add up to more than 100% of the page, the sidebar will be forced below the content.

To check this:

  1. Right-click on your page and select Inspect (Chrome/Firefox).
  2. Look at the width of your content and sidebar.

If your content is set to 70% width and your sidebar is 33% width, they won’t fit together (since they total 103% + margins).

To fix it, adjust the CSS:

.content-area {
width: 70%;
float: left;
}.sidebar {
width: 30%;
float: right;
}

And make sure any extra padding or margin doesn’t make them too wide.

@media (max-width: 768px) {
.sidebar {
width: 100%;
float: none;
}
}

6. Try a Default Theme

If nothing else works, try switching to a default WordPress theme like Twenty Twenty-One.

If the sidebar works fine there, then the issue is in your custom theme, and you may need to dig deeper into its settings or code.

Categories
WordPress Issues

How to Fix the WordPress Memory Exhausted Error – Increase PHP Memory

This can be caused by:

  • Too many plugins or themes taking up too much memory.
  • High website traffic or lots of content.
  • Poorly coded plugins or themes that use more memory than they should.
  • Large images or media files being processed.
WordPress Memory Exhausted Erro
How to Fix It:

Here are some easy ways to increase the PHP memory limit and fix the error:

1. Increase PHP Memory Limit in wp-config.php

  • Go to your WordPress root folder (using FTP or your file manager).
  • Open the wp-config.php file.
  • Add this line just before “That’s all, stop editing! Happy blogging”:

    define( ‘WP_MEMORY_LIMIT’, ‘256M’ );
    • You can change 256M to 128M, 512M, or whatever works for you based on your host’s limits.

2. Increase Memory in .htaccess (for Apache users)

  • Access your WordPress root folder.
  • Find and open the .htaccess file (it might be hidden, so show hidden files if needed).
  • Add this line at the top:
    bash
    php_value memory_limit 256M

3. Increase Memory in php.ini

  • If your host allows access to php.ini, find or create this file in your WordPress root directory.
  • Add this line:
    bash
    memory_limit = 256M
  • Some hosts might not let you change this, so contact their support if needed.

4. Contact Your Hosting Provider

If none of the above works or if you’re on a shared host with strict limits, reach out to your hosting support team. They can help increase the memory limit for you.

5. Disable or Optimize Plugins and Themes

  • Turn off any plugins you’re not using. Too many active plugins can eat up memory.
  • Make sure your plugins and themes are updated and well-coded. Old or inefficient plugins can cause problems.
  • Consider using a caching plugin like W3 Total Cache or WP Super Cache to lighten the load on your server.

6. Optimize Images and Media Files

  • Use tools like Smush, EWWW Image Optimizer, or ShortPixel to compress large images. This helps reduce memory usage during upload and processing.
  • Remove any unused media files from your library to save space.